Jumat, 02 Maret 2012
Kamis, 01 Maret 2012
skema lampu disco 220v
This disco lamp circuit is not a voice operated switch (VOX) because this circuit is too dumb to differentiate between musical sound or human voice. This is rather a sound activated than voice activated. One interesting application is to control your disco lighting automatically by the musical sound from high power amplifier, when the music signal is dominating the sound space. The disco lamp circuit schematic diagram is shown below.

You can use either moving coil microphone or condenser microphone for this circuit. Make sure the electrolytic capacitor is rated for 16 volt or more. The potentiometer shown in the schematic diagram is used to adjust the gain of the pre-amplification. You can adjust this potentiometer to get a proper sound level where the relay would be activated.
List Componet Of Disco Lamp circuit
- R1 : 22k 1/4 watt resistor
- R2 : 4K7 watt resistor
- R3 : 2K2 watt resistor
- R4,R8 : 10K watt resistor
- R5 : 33K watt resistor
- R6 : 56K watt resistor
- R7 : 1M watt resistor
- Potensio: 50K
- C1 : 470uf/35V electrolytic capacitor
- C2 : 22n ceramic capacitor
- C3 : 100n ceramic capacitor
- C4 : 1Uf/50V electrolyticcapacitor
- D1 - D5 : 1N4007
- D6 : Zener 5.1v
- D7 : 1N4148
- IC : CD 4069
- SCR : FIR 3D
- Mic : Mic Condensor
Control Kecapatan Fan
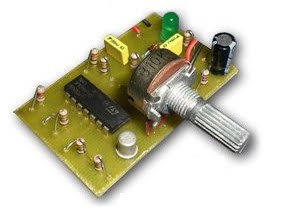
The following circuit is a circuit that is used to adjust the fan speed by using the PWM (Pulse Width Modulation). This circuit is very easy to make, and do not use the microcontroller or other digital components, for more details, let's look at his series of pictures below
VR1: 10K Potentiometer Function as the motor speed control.
R9: Resistor as a determinant of minimum speed. Diseri with 10K VR, R1 for 1K will provide the settings range from 0 - 100% better used if the load used is a motor or a lamp. If R1 for 10K, will provide the range 5V - 12V is suitable if the load used is the cooling fan.
Q1: For 600mA maximum load, we recommend using the 2N2222A transistors packed in a metal body (TO-18). To load up to 5A please try using a transistor TIP120, 121 or 122.
D1: Diode is used to prevent back-emf which usually occurs in the load inductor such as Fan or Motor. Back-emf can damage the transistor!
D1: Diode is used to prevent back-emf which usually occurs in the load inductor such as Fan or Motor. Back-emf can damage the transistor!

Lay out PCD pic
Description IC The LM124 Low Power Quad Operational Amplifier
 The LM124 series consists of four independent, high gain, internally frequency compensated operational amplifiers which were designed specifically to operate from a single power supply over a wide range of voltages. Operation from split power supplies is also possible and the low power supply current drain is independent of the magnitude of the power supply voltage.
Application areas include transducer amplifiers, DC gain blocks and all the conventional op amp circuits which now can be more easily implemented in single power supply systems. For example, the LM124 series can be directly operated off of the standard +5V power supply voltage which is used in digital systems and will easily provide the required interface electronics without requiring the additional ±15V power supplies.
Rangkaian Penguji Transistor
This is a circuit can b e used to check the hfe of transistors. Both PNP and NPN transistors can be checked using this circuit. Hfe as high as 1000 can be measured by using this circuit. This circuit is based on two constant current sources build around transistors Q1 and Q2. Q1 is a PNP transistor and the constant current flows in the emitter lead. The value of constant current can be given by the equation; (V D1 -0.6)/ (R2+R4).The POT R4 can be adjusted to get a constant current of 10uA.
Q2 is an NPN transistor and the constant current flows into the collector lead. The value of this constant current can be given by the equation; (VD2-0.6)/(R3+R5).The POT R5 can be adjusted to get a constant current of 10uA.This constant current provided by the Q1 circuit if the transistor under test is an NPN transistor and by Q2 circuit if the transistor under test is a PNP transistor is fed to the base of transistor under test. This current multiplied by the hfe flows in the collector of the transistor and it will be indicated by the meter. The meter can be directly calibrated to read the hfe of the transistor.
- D1,D2: Diode Zener 5.6volt 1/2 watt
- Q1: 2N2907 PNP transistor
- Q2: 2N222 NPN transistor
- R2,R3: 470K Resistor
- R4,R5: 100K Variable Resistot (Potensiometer)
- M1: Miliampere meter Analog (10mA)
- J1,J2: transistor sockets
Langganan:
Postingan (Atom)


